Summer Treat: Berry Lemonade
serves 12
8 cups cold water
2 cups sugar
2 cups fresh lemon juice (15-16 lemons) — I only needed about half the amount of lemons to get enough juice. If your lemons are larger, I’d just get 10.
3 strips (3 inch x 1 inch) lemon peel
1 cup raspberries
1 cup blackberries
extra berries for garnish
Prepare syrup – In 4-quart saucepan, heat 4 cups water with sugar and lemon peel to boiling over high heat, stirring occasionally. Cover saucepan and boil 3 minutes. Remove saucepan from heat.
Meanwhile, in food processor, pulse berries until pureed. Pour into medium-mesh sieve set over large bowl and press berry mixture with back of spoon to remove seeds; discard seeds.
Remove peel from syrup; stir syrup into berry puree with lemon juice and remaining 4 cups water. Makes 13 cups. Pour into large pitcher with tight-fitting lid. Cover and refrigerate until cold, at least 3 hours or up to 2 days. Serve over ice. Garnish with berries and lemon slices.
Party Time!
Busy Day Cupcakes
(my grandma’s original recipe for yellow cake with broiled brown sugar and coconut frosting)
Shoofly Cupcakes
(an Amish country molasses-based cake with crumb topping- the cake version of the classic Amish pie)
Pennsylvania Dutch Cooking: Ham and Green Beans
I grew up right in the middle of Lancaster county, aka Amish Country USA. There are lots of old PA Dutch recipes that no one has heard of.. Shoofly Pie, Chicken Pot Pie without the crust (far superior to crusted pot pie), Fastnachts, original Whoopie Pies, Scrapple, Pig Stomach.. the list goes on, and brings us to Ham and Green Beans.
People, you haven’t lived until you’ve had this country meal. It takes a little time, but it’s so worth it. The recipe I have for you today is the old fashioned way, but there are shortcut recipes out there if you’re short on time. The way the savory flavors of the ham and green beans come together with the creaminess of the potatoes.. it’s so good.
It’s simple. It tastes like home.
Ham and Green Beans
3-4 lb bone-in ham, uncooked
1-2 lb green beans, trimmed
5-6 potatoes, peeled and cut into large pieces
salt and pepper
1. In a large stock pot, cover the ham with water. Boil for 2 1/2-3 hours. Add extra water to cover as needed.
2. Add green beans to the pot and cook for 20-30 minutes. Remove the ham and add the potatoes. Cut or shred the meat while the potatoes cook until tender, about 30 minutes. Add the meat back to the pot and heat until warmed through. Let simmer until ready to serve.
TWD: Brownie Buttons
Brownie Buttons: fun! Jayma at Two Scientists Experimenting in the Kitchen picked these little cuties this week.
I decided to include the orange flavor, but I used extract instead of zest. I also subbed dark chocolate for the white chocolate on top. I was hoping they would puff up a little more than they did, but I guess buttons are supposed to be flat.
*Find the recipe here.
**Tuesdays with Dorie is a group of bloggers baking through Dorie Greenspan’s Baking: From My Home to Yours.
PMOW Soft Pretzel Round Up
Check out all of the lovely pretzel creations below:
 Pretzel twists from Charli at The Berry Bushel
 Buffalo Chicken Pretzels from Jen at My Kitchen Addiction (what an amazing idea!)
I’d really love to post August’s challenge within the next day or two to give everyone lots of time. What are your thoughts for next month? I’m stuck between homemade BBQ sauce/ketchup and homemade granola bars, but other ideas welcome!
Tuesdays With Dorie: Banana Bundt Cake
My main reason was because I love Mary so much, but also because I’ve wanted to try out the recipe in the past. Mary is the queen of bundt cakes, but I decided to do mini loaves because (gasp!) I don’t have a bundt pan.
I made half the recipe, which made 8 little loaves. I used the yogurt instead of sour cream and added some cinnamon to the batter as well. I think they taste yummy plain, but I also gave it a try with a bit of leftover cream cheese frosting, and anyone who’s anyone knows that cream cheese frosting on anything is yumlicious.
*Find the recipe here.
**Tuesdays with Dorie is a group of bloggers baking through Dorie Greenspan’s Baking: From My Home to Yours.
Soft Pretzels
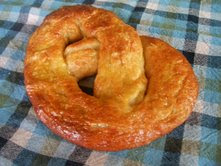
The last time I tried to make soft pretzels, I wasn’t pleased with the results. I should have known that all I needed was an Alton Brown recipe! This soft pretzel recipe was the challenge for July’s Pre-Made Our Way Challenge (PMOW). I decided to try out lots of different shapes to decide which I liked best.
It’s so worth it.
Best Quick Pizza Dough
I have been craving lots of pizza lately, but didn’t build up the energy to make this recipe until last night. The best thing about this pizza dough recipe is that you can use it right away, and you’ll have your pizza in under 30 minutes- which is often quicker than the delivery guys anyways.
I got this recipe from my sister-in-law (the Passionate Homemaker) via Money Saving Mom, and I’ve stuck with the recipe ever since. It’s so easy to pull together short notice, and actually tastes good, too. It’s a God-send!
Our favorite pizza to make is BBQ Chicken. I use cooked chicken, BBQ sauce, cheddar/jack cheese, and red onions. Husbands go crazy for this stuff! I’m also a fan of Hawaiian, but that’s just me. So next time you get a craving for pizza, all you need to do is grab this recipe and hit the pantry.
Pizza Crust
(from Money Saving Mom)
1 Tbsp. active dry yeast
1 cup warm water (105 to 115 degrees F.)
1 tsp. sugar
1 tsp. salt
2 Tbsp. vegetable oil (I use olive oil)
2 1/2 cups flour
Dissolve the yeast in the water. Add the rest of the ingredients in and mix. Dump onto a floured surface. Knead into a smooth dough (five minutes or so). Roll out and press down onto a greased pizza pan. Add toppings. Bake at 450 degrees F. for around 12-15 minutes until the crust looks crispy and lightly browned.
*Note- you can also make double or triple of the recipe, freeze it, and then pull it out in the morning to thaw in the fridge for an evening meal. Even simpler!
Don’t forget the Pretzels!
But, if you’re like me, and you want to make them, but you haven’t yet, I’ll accept entries until Sunday night at midnight. 😉
Click here for more details on the challenge.
Happy baking!
Sweet Cherry Hand Pies
Nothing appeals.
Luckily, I had an occasion to bake for last week, and I made these little beauties.
Sweet Cherry Hand Pies
(based on Smitten Kitchen’s Bourbon Peach Hand Pies. the dough is SK’s recipe, the filling is mine.)
Makes 12-14 (depending on cutter size)
For the pastry:
2 1/2 cups all-purpose flour
1/2 tsp. salt
16 tablespoons (2 sticks, 8 ounces) unsalted butter, cut into
pieces
1/2 cup sour cream
4 teaspoons fresh lemon juice
1/2 cup ice water
For the filling:
1 lb sweet cherries, pitted and halved
1/4 cup flour
1/4 cup sugar
Pinch of salt
1 teaspoon almond extract
One egg yolk beaten with 2 tablespoons water (for egg wash)
Coarse sanding sugar, for decoration
1. To make the pastry, in a bowl, combine the flour and salt. Place the butter in another bowl. Place both bowls in the freezer for 1 hour. Remove the bowls from the freezer and make a well in the center of the flour. Add the butter to the well and, using a pastry blender, cut it in until the mixture resembles coarse meal. Make another well in the center. In a small bowl, whisk together the sour cream, lemon juice and water and add half of this mixture to the well. With your fingertips, mix in the liquid until large lumps form. Remove the large lumps and repeat with the remaining liquid and flour-butter mixture. Pat the lumps into a ball; do not overwork the dough. Cover with plastic wrap and refrigerate for 1 hour. If preparing ahead of time, the dough can be stored at this point for up to one month in the freezer.
2. Divide the refrigerated dough in half. On a lightly floured work surface, roll out one half of the dough to 1/8-inch thickness. Using a 4 1/2-inch-round biscuit cutter, cut seven circles out of the rolled dough. Transfer the circles to a parchment-lined baking sheet, and place in the refrigerator to chill for about 30 minutes. Repeat the rolling, cutting, and chilling process with the remaining half of dough. (I used a 4-inch cutter–if you can call a “cutter” the tin edge of the container that holds my smaller round cutters–and managed to get 12 from each dough half, after rerolling the scraps.)
3. Make the filling: Mix the cherries with the flour, sugar, salt and almond extract.
4. Remove the chilled dough from the refrigerator, and let stand at room temperature until just pliable, 2 to 3 minutes. Spoon about 1 to 2 tablespoons filling (use the smaller amount for a 4-inch circle) onto one half of each circle of dough. Quickly brush a little cold water around the circumference of the dough, and fold it in half so the other side comes down over the filling, creating a semicircle. Seal the hand pie, and make a decorative edge by pressing the edges of the dough together with the back of a fork. Repeat process with remaining dough. Place the hand pies back on the parchment-lined baking sheet, and return to the refrigerator to chill for another 30 minutes.
5. Heat oven to 375 degrees. Remove the chilled hand pies from the refrigerator, cut a small slit in each and lightly brush with the egg yolk wash. Sprinkle sanding sugar generously over the pies, and place pies in the oven to bake. Bake until the hand pies are golden brown and just slightly cracked, about 20 minutes. Remove the pies from the oven, and let stand to cool slightly before serving.


