Roasted Spring Vegetable Salad with Chicken
(Sorry for not writing more- must go lay down until the nausea passes.)
Roasted Spring Vegetable Salad with Chicken
Recipe Components:
spring vegetables (I included green beans, potatoes and zucchini)
your favorite spices (I used salt, pepper, dried Italian seasoning, garlic powder, etc)
olive oil
cooked chicken
mixed greens
balsamic vinaigrette
Preheat oven to 400 degrees. Toss vegetables, spices and olive oil in a shallow roasting pan. Roast, tossing occasionally, until cooked through, about 20-25 minutes. Meanwhile, prepare mixed greens and warm the cooked chicken. Top the mixed greens with vegetable mixture, chicken and your favorite balsamic vinaigrette. Serve while still warm.
Vegetable Farfalle in Tomato Broth
You may have noticed the lack of posts.
Don’t blame me. It’s the baby.
Yesterday, I did manage to throw this meal together. It’s based on an old favorite from my time working at Maggiano’s, with a little more tomato flavor. I wanted something that was lighter than a traditional pasta dish, but not quite soup. I wish I could tell you how amazing it tastes, but I haven’t been tasting things like I used to. I know it’s yummy, though, and good for you, and vegetarian. And Nick liked it!
This recipe is also a good use of any veggies you have- as I always say, just throw them in. This particular batch has swiss chard from the CSA and broccoli from our own garden. Yum!
Vegetable Farfalle in Tomato Broth
1 lb farfalle (bowtie pasta)
olive oil
1 onion, rough chopped
2 garlic cloves, minced or grated
1 head of broccoli, chopped into florets
1 bunch swiss chard or spinach, rough chopped
1 can diced tomatoes in juice (I prefer fire roasted)
1-2 cups chicken or vegetable broth
tomato paste (optional)
salt and pepper
parmesan cheese, for grating
1. Cook pasta in heavily salted water according to package directions. Set aside one cup of pasta water for later.
2. While pasta is cooking, heat olive oil in a large frying pan. Add onion and garlic, and saute until soft, 5 minutes. Add broccoli, cook another 5 minutes. Add greens, saute until wilted.
3. Combine pasta and vegetable mixture in the large pasta pot. Add the tomatoes with liquid and broth and heat through. Add more broth as needed. Season with salt and pepper, add tomato paste if you want a stronger tomato flavor. Serve in bowls with grated parmesan cheese.
July PMOW Challenge: Soft Pretzels

Instructions: This is a totally relaxed challenge. Anyone and everyone is invited to join in. As usual, the only real requirement is to bake them. Ideally, though, please bake, take a photo or two, and post about it on your blog (it’s okay if you don’t have one!). Then, send one picture, the link to your blog post, and any comments to me at natalieherr@gmail.com. Then I’ll post a round-up of all of the participants by the end of the month. Please post and send pictures/comments by Friday, July 31 at midnight. Have fun!
I’m going to suggest Alton Brown’s recipe for soft pretzels, but if you find another one you like better, feel free to give that one a try as well. There’s a great tutorial at Macheesmo on baking through Alton’s recipe.
Alton Brown
- 1 1/2 cups warm (110 to 115 degrees F) water
- 1 tablespoon sugar
- 2 teaspoons kosher salt
- 1 package active dry yeast
- 22 ounces all-purpose flour, approximately 4 1/2 cups
- 2 ounces unsalted butter, melted
- Vegetable oil, for pan
- 10 cups water
- 2/3 cup baking soda
- 1 large egg yolk beaten with 1 tablespoon water
- Pretzel salt
Combine the water, sugar and kosher salt in the bowl of a stand mixer and sprinkle the yeast on top. Allow to sit for 5 minutes or until the mixture begins to foam. Add the flour and butter and, using the dough hook attachment, mix on low speed until well combined. Change to medium speed and knead until the dough is smooth and pulls away from the side of the bowl, approximately 4 to 5 minutes. Remove the dough from the bowl, clean the bowl and then oil it well with vegetable oil. Return the dough to the bowl, cover with plastic wrap and sit in a warm place for approximately 50 to 55 minutes or until the dough has doubled in size.
Preheat the oven to 450 degrees F. Line 2 half-sheet pans with parchment paper and lightly brush with the vegetable oil. Set aside.
Bring the 10 cups of water and the baking soda to a rolling boil in an 8-quart saucepan or roasting pan.
In the meantime, turn the dough out onto a slightly oiled work surface and divide into 8 equal pieces. Roll out each piece of dough into a 24-inch rope. Make a U-shape with the rope, holding the ends of the rope, cross them over each other and press onto the bottom of the U in order to form the shape of a pretzel. Place onto the parchment-lined half sheet pan.
Place the pretzels into the boiling water, 1 by 1, for 30 seconds. Remove them from the water using a large flat spatula. Return to the half sheet pan, brush the top of each pretzel with the beaten egg yolk and water mixture and sprinkle with the pretzel salt. Bake until dark golden brown in color, approximately 12 to 14 minutes. Transfer to a cooling rack for at least 5 minutes before serving.
Cheese Danish Revisited
This time around, I chose to make individual danishes, since they’re easier to grab and go. The danish dough recipe I use makes two danish braids, which translated to 30 individual danishes. I could have made them a little bigger, but then they wouldn’t last as long! They’re also freezable- a big plus when you’re delivering fresh sweets in bulk.
To learn how to twist the danish dough into the proper shape, I consulted Joe Pastry. This guy is amazing- a real danish expert. He’s got a whole list of pastry shapes to pick from- I used the Classic Sweet Roll shape. You get to play with the dough and do a little twisting, but it’s more fun than it is difficult. Pretty simple. Just twist them up, let them proof, and then spoon on your filling.
Perfect if you like to carry danishes around on a daily basis.
I’m thinking of trying out some fruit and cream cheese mixtures next time.. strawberries and cream, anyone?
Visit Sass & Veracity for the danish dough recipe.
(I usually sub the cardamom for cinnamon.)
My cream cheese filling
(fills one braid or 20-30 individual pastries)
1 block cream cheese
1/2 cup sugar
1/2 tsp vanilla
Combine all and mix until smooth.
Smitten Kitchen’s Strawberry Rhubarb Crumble
This is my ode to fresh strawberries and rhubarb, and I think it’s quite a fitting tribute.
I was going to throw together a strawberry and rhubarb crumble on my own, but then I thought better, and enlisted the help of Smitten Kitchen.
I love crumbles with lots of topping, and SK’s Strawberry Rhubarb Crumble delivers just that. Everyone knows the topping is the best part of a crumble, so it’s essential to have some in every bite. It’s the perfect match for that sweet and tart fruit filling.
In SK’s original post, she talks about her basic crumble recipe and how she makes it work for any combination of fruits. So it’s customizable- you know I love that!
Smitten Kitchen’s Strawberry-Rhubarb Crumble
Yields 6 to 8 servings.
For the topping:
1 1/3 cup flour
1 teaspoon baking powder
3 tablespoons sugar
3 tablespoons Demerara sugar (or turbinado sugar aka Sugar in the Raw)
Zest of one lemon
1/4 pound (1 stick or 4 ounces) unsalted butter, melted
For the filling:
1 1/2 cups rhubarb, chopped into 1-inch pieces
1 quart strawberries plus a few extras, hulled, quartered
Juice of one lemon
1/2 cup sugar
3 to 4 tablespoons cornstarch (some commenters found the flour option a little too, well, floury so this has been updated)
Pinch of salt
1. Heat oven to 375°F. Prepare topping: In a mixing bowl, combine flour, baking powder, sugars and lemon zest and add the melted butter. Mix until small and large clumps form. Refrigerate until needed.
2. Prepare filling: Toss rhubarb, strawberries, lemon juice, sugar, cornstarch and a pinch of salt in a 9-inch deep-dish pie plate. (I used an oval dish this time, because they fit better in the bottom of a shopping bag.)
3. Remove topping from refrigerator and cover fruit thickly and evenly with topping. Place pie plate on a (foil-lined, if you really want to think ahead) baking sheet, and bake until crumble topping is golden brown in places and fruit is bubbling beneath, about 40 to 50 minutes.
*All comments in the recipe are copied directly from Smitten Kitchen.
An Appleseed and An Annoucement
I’m pregnant!
So, while I’ll try to keep up with regular blogging, I may take breaks every now and then, and I may skip a TWD or two, but I’ll still be excited to read about everyone else’s creations when I miss out (like today- I just can’t stomach chocolate right now.. it’s crazy!).
!
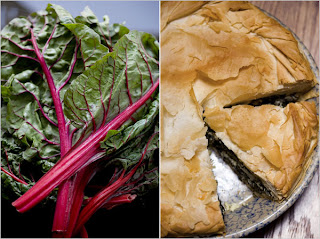
How to Eat Swiss Chard
Chard recipes galore!

 Greek Swiss Chard Pie (New York Times)
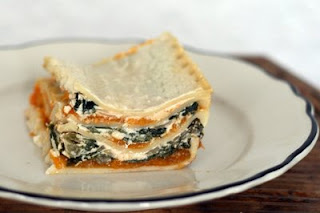
 Butternut Squash and Swiss Chard White Lasagna (Coconut&Lime)
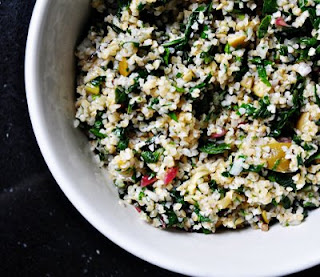
 Bulgur Salad with Wilted Swiss Chard and Green Olives (The Parsley Thief a la Fine Cooking)
 Garlic Roasted Garbanzo Beans and Swiss Chard over Polenta (Eggs on Sunday)
Swiss Chard and Artichoke White Pizza (Farmgirl Fare)
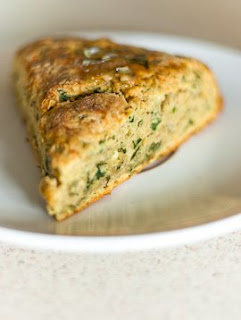
 Chard and Feta Scones (Two Spoons)
 Provencal Greens Soup (New York Times)
 Chard Salad with Walnut Raspberry Dressing (What Geeks Eat)
 Leek and Swiss Chard Tart (Smitten Kitchen)
Tuesdays With Dorie: Perfect Party Cupcakes
Mexican Stuffed Poblano Peppers
Chocolate Chip Cookies.. a little late!
So, like forever ago, Miss Aleta at Omnomicon hosted a little round robin to find the best chocolate chip cookie recipe. Each tester got two recipes to try. Though, lazily, I never sent my vote in, I favored this chocolate chip recipe above the other- by leaps and bounds! The other cookie turned out so horribly that I am not at liberty to post a photo. This is probably my favorite chocolate chip cookie recipe ever. Hands down. There’s not much more I can say about it- everyone knows what it’s like to taste an amazing chocolate chip cookie.


