Popsicles, again?
Yes, always.
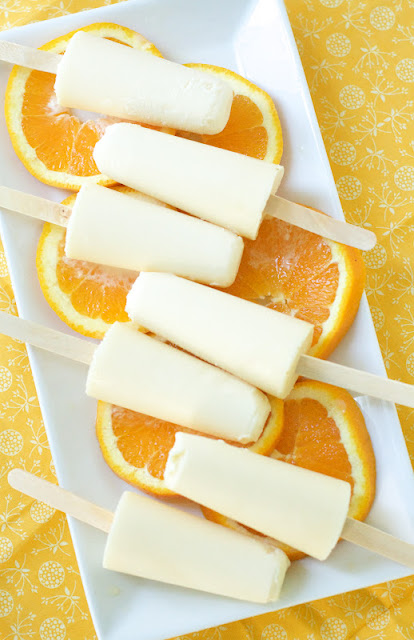
Orange popsicles, that is, since I apparently that’s my specialty. (See these creamsicles and mango yogurt pops for the proof.)
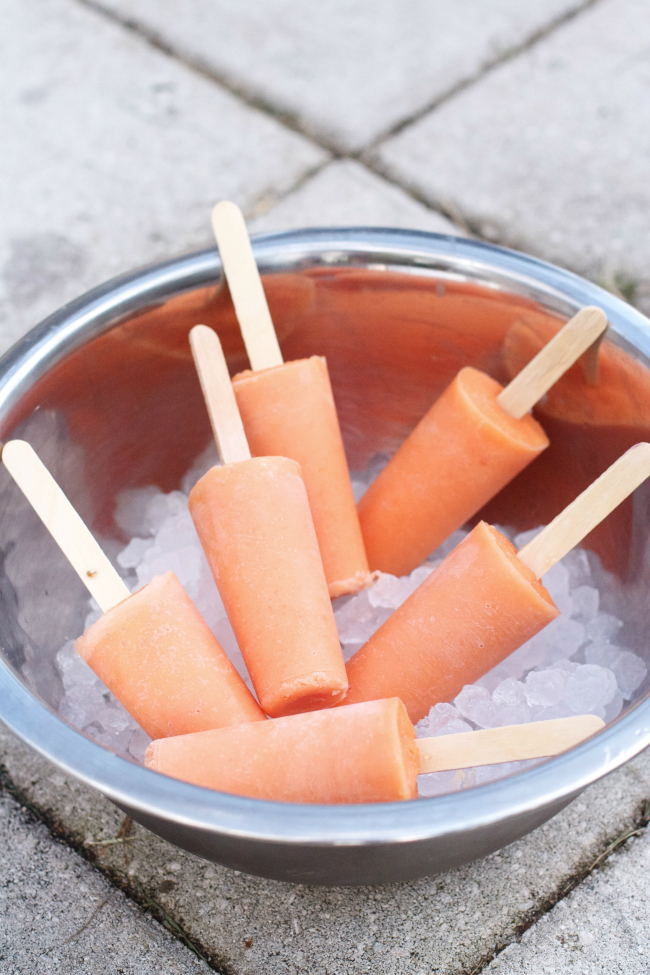
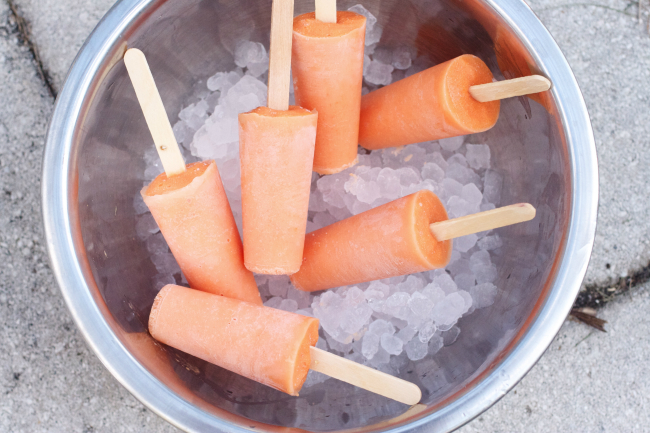
While cleaning out the fridge last week, I came upon half a papaya that needed some love (aka I didn’t have the heart to throw it out.) Usually I buy papaya strictly for juices (it’s anti-inflammatory and ya’ll know I need some of that!) but it looked past it’s juicing prime. So popsicles seemed the obvious choice in the heat of summer and because for some reason I couldn’t just cut it up and eat it like a normal person.
I could have made them straight papaya, but I love to add a bit of creaminess to my pops. I was out of any useful coconut products, so I used the cream from the top of the raw milk jar. It was a wise choice, believe you me. A little bit of lime, vanilla and honey and BAM- papaya pops comin’ at ya.

Next time you have half a papaya sitting alone in your fridge, this recipe can be your go-to. I assume that probably won’t happen to most of you, but a girl can dream.. someone out there thinks my blog is useful and actually makes my recipes, right? haha 
Really, though- I love you guys. Thanks for reading my crazy popsicle posts and sticking around Oven Love for all these years. You’re the bees.
- ½ large ripe red papaya, peeled and seeded
- ⅓ cup heavy cream, coconut cream, or full-fat coconut milk (or omit all together, if you like)
- juice of one lime
- 1 teaspoon pure vanilla extract
- 1-2 tablespoons raw honey (optional)
- Place all ingredients in a blender and puree. Pour into popsicle molds and add popsicle sticks.
- Freeze for 3-5 hours or until firm. Run warm water over the mold if the popsicles don’t come right out. Serve immediately.

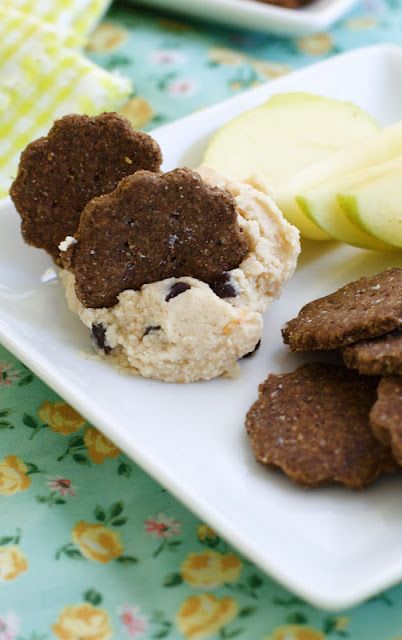
- 8 oz ricotta cheese (try my homemade recipe here)
- 4 oz mascarpone cheese (you can sub cream cheese if you need to)
- 2 tablespoons honey
- ¼-1/2 teaspoon cinnamon
- ½ teaspoon vanilla
- zest of ½ an orange, plus more zest for topping
- 2-4 tablespoons heavy cream
- ¼ cup mini chocolate chips, plus more for topping
- sliced fruit, crackers, etc for dipping
- In a stand mixer, combine ricotta and mascarpone cheeses and blend until smooth. Add honey, cinnamon, vanilla, orange zest and 2 tablespoons of the heavy cream and mix to combine. If the dip is still too stiff, add more cream 1 tablespoon at a time until you reach your desired consistency. Scoop into a bowl and serve.
- If you have any leftovers, store in the fridge- it should keep for a week or so.

- 1 half-gallon of raw milk
- 1 cup cream (either skimmed from other raw milk or bought separately)
- 1 teaspoon sea salt
- juice of 1 lemon
- Cut a square of cheesecloth to line your strainer. Place the strainer over a large bowl.
- In a stockpot, combine the milk, cream and salt. Bring to a boil slowly, stirring often to prevent scorching.
- When the milk is at a boil, add the lemon juice. Reduce to a simmer and cook for 5 minutes, stirring constantly, until small curdles start to form.
- Pour the mixture into your cheesecloth-lined strainer and let drain for 10 minutes. Discard the remaining liquid (or feed it to your pets/animals). Store the cheese in the refrigerator for up to a week.
]]>

- ½ cup unsalted butter, softened
- ½ cup olive oil
- 1 cup sugar
- 1 cup brown sugar
- 2 teaspoons vanilla extract
- 1 teaspoon baking soda
- ½ teaspoon baking powder
- ½ teaspoon salt
- 2 large eggs
- ½ cup yogurt (I use greek)
- 1 cup all-purpose flour
- 1¼ cup whole wheat flour
- ¾ cup cocoa powder
- 2 teaspoons espresso powder (optional)
- 2 cups shredded zucchini
- ½ cup chocolate chips or chopped chocolate
- 4 ounces bittersweet chocolate, chopped
- ½ cup heavy cream
- 2 tablespoons sugar
- 2 tablespoons water
- Preheat the oven to 350 degrees. Prepare a cake pan (I used a 10-inch round springform pan because there’s a lot of batter) with butter and flour or baking spray.
- Cream the butter, oil, sugars, vanilla, baking soda, baking powder and salt together until well-combined. Beat the eggs in one at a time. Add half of the flour, stir; add the yogurt, stir; and add the rest of the flour, cocoa powder and espresso powder (if using) and stir again. Add the zucchini and chocolate chips and stir to combine. Pour the batter into the pan and bake for 35-50 minutes or until a toothpick comes out clean.
- Meanwhile, place the chocolate into a small bowl. Heat the heavy cream, sugar and water until warm (not boiling) and pour it over the chocolate. Stir to combine. Let sit until thickened.
- When you’re ready to serve, you can pour the chocolate sauce over the whole cake or on individual sliced. You can serve hot or at room temperature, but it is best enjoyed in the first day or two of baking.

- 1 cup orange juice (fresh or frozen. you could also use orange juice concentrate for a stronger orange flavor)
- 1 cup heavy cream or full fat coconut milk (you could also substitute melted/very soft vanilla ice cream)
- 3 tablespoons honey
- ¼ teaspoon orange extract
- ½ teaspoon vanilla extract
- In a medium bowl, whisk all ingredients together.
- Pour mixture into popsicle molds. Let set for 30-60 minutes, then add popsicle sticks. Freeze for another 4-6 hours or until frozen.
- When you’re ready to serve, run some warm water along your popsicle mold to loosen the popsicles and serve immediately.

- 4 oz bittersweet chocolate, finely chopped
- ½ cup heavy cream
- 2 tablespoons sugar
- 2 tablespoons water
- Put the chopped chocolate in a heatproof bowl.
- Bring the cream, sugar and water to a full boil, then pour the liquid over the chocolate and let sit for 30 seconds. Working with a whisk or rubber spatula, gently stir the chocolate and cream together in small circles, starting at the center of the bowl and working your way out in increasingly larger concentric circles.
- If you are pouring the glaze over a chilled cake or cupcakes that is already frosted, the glaze can be used soon after it is blended. If you are pouring it over a room temperature cake or cupcakes, leave the glaze on the counter until it thickens just enough to pour in a ribbon.
- 2 cups whole milk
- 6 large egg yolks
- ½ cup sugar
- ⅓ cup cornstarch
- 1½ teaspoons pure vanilla extract
- 3½ tablespoons unsalted butter, cut into bits, at room temperature
- Bring the milk to a boil in a small saucepan.
- Meanwhile, in a medium heavy-bottomed saucepan, whisk the yolks together with the sugar and cornstarch until thick and well blended. Whisking without stop, drizzle in about ¼ cup of the hot milk- this will temper, or warm, the yolks- then, still whisking, add the remainder of the milk in a steady stream. Put the pan over medium heat and, whisking vigorously, constantly and thoroughly (make sure to get into the edges of the pan), bring the mixture to a boil. Keep at a boil- still whisking- for 1-2 minutes, then pull the pan from the heat.
- Whisk in the vanilla extract. Let stand for 5 minutes, then whisk in the bits of butter, stirring until the butter is fully incorporated and the pastry cream is smooth and silky. Scrape the cream into a bowl. You can press a piece of plastic wrap against the surface of the custard to create an airtight seal and refrigerate the pastry cream until cold (at least an hour).
- ½ cup whole milk
- ½ cup water
- 8 tablespoons unsalted butter, cut into 4 pieces
- 1 tablespoon sugar
- ½ teaspoon salt
- 1 cup all-purpose flour
- 4 large eggs at room temperature
- Bring the milk, water, butter, sugar and salt to the boil in a heavy-bottomed 2-quart saucepan. When the mixture is boiling rapidly, add the flour all at once, reduce the heat to medium and, without a second’s hesitation, start stirring the mixture like mad with a wooden spoon. The dough will come together very quickly and a slight crust will form on the bottom of the pan, but you have to keep stirring – vigorously – another 2 to 3 minutes to dry the dough. At the end of this time, the dough will be very smooth.
- Turn the dough into the bowl of a mixer fitted with the paddle attachment or, if you’ve still got some elbow grease left, you can continue by hand. One by one, add the eggs to the dough, beating until each egg is thoroughly incorporated. Don’t be discouraged – as soon as you add the first egg, your lovely dough will separate. Keep working and by the time you add the third egg it will start coming together again. When all the eggs are incorporated, the dough will be thick and shiny and, when you lift some of it up it will fall back into the bowl in a ribbon. The dough will still be warm – it’s supposed to be – and now is the time to use it. ]
- Using about 1 tablespoon of dough for each puff, drop the dough from the spoon onto the lined baking sheets, leaving about 2 inches of space between each mound of dough.
- Slide the baking sheets into the oven, bake for 15 minutes, then rotate the sheets from top to bottom and front to back. Continue baking until the puffs are golden and firm, another 10 to 15 minutes. Transfer the cream puffs to a cooling rack.
- When the puffs are cool, use a pastry bag with a small tip to poke a hole into each cream puff and fill them with Vanilla Pastry Cream (see recipe below). Store in the refrigerator or freezer until ready to eat.
- 16 large egg whites (30g each–total 450g, or 2 cups)
- 4 cups granulated sugar (800g)
- 5 cups (2.5 lbs, 10 sticks) of unsalted butter, softened but cool, cut into cubes
- 30 ml (2 tablespoons) pure vanilla extract
- ¼ tsp salt
- Wipe the bowl of an electric mixer, whisk attachment, small bowl, and whisk with paper towel and lemon juice (or vinegar), to remove any trace of grease. Add egg whites and sugar, and simmer over a pot of water (not boiling), whisking constantly but gently, until temperature reaches 140 degrees F, or if you don’t have a candy thermometer, until the sugar has completely dissolved and the egg whites are hot (you can feel a drop in between your fingers to ensure no granules.).
- Take off of stove, and place bowl back on electric mixer fitted with whisk attachment, begin to whip until the mixture is thick, glossy, and neutral (you can feel outside of the bowl to test temperature).
- Switch over to paddle attachment and, while mixing on low speed continously, add butter one cube at a time until incorporated, and mix until it has reached a silky smooth texture (if curdles, keep mixing and it will come back to smooth).
- Add vanilla and salt, mix well. If buttercream is too runny, the butter was possibly too soft–place into the refrigerator for about 15 minutes, then beat again. If still too runny, add a few more cubes of butter and keep beating until it reaches Use immediately, or refrigerate/freeze.
- 1¾ cups (175 grams) cake flour, not self-rising
- 1½ teaspoons baking powder
- ½ teaspoon baking soda
- ½ teaspoon salt
- 1 cup (225 grams) granulated sugar
- ¼ cup (57 grams) unsalted butter, room temperature
- 2 large eggs, room temperature
- ⅓ cup (75 grams) full-fat sour cream
- ¼ cup canola oil or vegetable oil (60 ml)
- 1 tablespoon pure (not imitation) vanilla extract
- ⅔ cup (160 ml) whole milk
- Preheat oven to 350 F.
- In a medium-sized mixing bowl or bowl of a stand mixer, mix together cake flour, baking powder, baking soda, and salt.
- Add the sugar and mix until well combined.
- Add butter and mix on medium-low speed for three minutes. Because there is so little butter, you’ll end up with a very fine crumb texture.
- In a small mixing bowl, whisk together eggs, sour cream, oil, and vanilla extract until smooth.
- Add the egg mixture to the flour mixture and beat on medium speed until just combined.
- Slowly add milk and mix on low speed until just combined. The batter will be liquid. (Don’t worry, you didn’t do anything wrong. It’s supposed to be that way.)
- Fill cupcake liners just over ½ full.
- Bake for 14 minutes and then test to see if they are done. They are done when a toothpick comes out without wet batter stuck to it. The cupcakes should appear white with specks of vanilla bean. They should not turn a golden brown. If they are not done, test again in two minutes. If they are still not done, test again in another two minutes.
- When the cupcakes are done, remove them immediately from the tins and leave them on a cooling rack (or just on your counter if you don’t own a cooling rack) to cool.
- 1 batch Vanilla Cupcakes, baked and cooled
- 1 cup Vanilla Pastry Cream (in addition to the pastry cream used to fill the cream puffs, if you are making them from scratch)
- 1 batch Vanilla Swiss Meringue Buttercream
- 2 batches Chocolate Ganache Glaze, cooled slightly (2 batches is an estimate, you made need more/less)
- 16 Cream Puffs (purchased or made with the Cream Puff Dough and Pastry Cream below)
- powdered sugar, for dusting
- Use a small, serrated knife to cut a round hole into the top of your cupcake. Remove cake from the hole with a spoon.
- Fill the cupcake with pastry cream. You can do this with a spoon or with a pastry bag.
- Pipe the buttercream in a circular motion on top of the cupcake, covering the pastry cream filling. Let set in the refrigerator until frosting seems firm.
- Remove the cupcakes from the fridge. Using a spoon, drip the ganache on top of the cold buttercream and top with a cream puff. Let cool in the fridge until set. These cupcakes are best enjoyed at room temperature, so if you are storing them in the refrigerator, allow them to come to room temperature before you serve them. Add a dusting of powdered sugar and enjoy.
- 1 cup whole milk
- ¾ cup sugar
- 2 cups heavy cream, divided
- pinch of salt
- 2 cups packed fresh mint leaves
- 5 large egg yolks
- 10-15 mint cream-filled chocolate cookies, like Newman-O’s Hint-O-Mint
- In a medium saucepan, warm the milk, sugar, 1 cup (250 ml) heavy cream, salt, and mint.
- Once the mixture is hot and steaming, remove from heat, cover, and let stand for an hour to infuse the mint flavor.
- Remove the mint with a strainer, then press down with a spatula firmly to extract as much mint flavor and color as possible. (You can also use well-washed hands to do it as well, making sure the mixture isn’t too hot to safely handle.) Once the flavor is squeezed out, discard the mint.
- Pour the remaining heavy cream into a large bowl and set the strainer over the top.
- Rewarm the infused milk. In a separate bowl, whisk together the egg yolks, then slowly pour some of the warm mint mixture into the yolks, whisking constantly, then scrape the warmed yolks back into the saucepan.
- Cook the custard, stirring constantly with a heatproof spatula, until the mixture thickens and coats the spatula. If using an instant read thermometer, it should read around 170ºF (77ºC).
- Immediately strain the mixture into the cream, then stir the mixture over an ice bath until cool.
- Refrigerate the mixture thoroughly, preferably overnight, then freeze it in your ice cream maker according to the manufacturer’s instructions.
- While the mixture is freezing, melt the chocolate in a small bowl over a pot of simmering water, or in a microwave oven on low power, stirring until smooth. Place a storage container in the freezer.
- When the ice cream in the machine is ready, scribble some of the chocolate into the container, then add a layer of the just-churned ice cream to the container. Scribble melted chocolate over the top of the ice cream, then quickly stir it in, breaking up the chocolate into irregular pieces. Continue layering the ice cream, scribbling more chocolate and stirring as you go.
- When finished, cover and freeze until firm.

- ⅓ lb farfalle (bowtie) pasta
- 1 head broccoli, cut into florets
- 2 cloves garlic, thinly sliced
- 3 tablespoons olive oil
- 3/8 teaspoon red pepper flakes
- 3 salted anchovy filets or anchovy paste (omit if necessary and add a little extra salt to compensate)
- ¼ cup heavy cream
- ½ cup grated parmesan cheese
- fresh cracked black pepper
- Bring a large pot of salted water to boil. Add pasta and broccoli florets and boil until al dente (it should still have a little bite to it). Meanwhile, fry the garlic in olive oil until fragrant. Turn off the heat and add red pepper flakes to the garlic oil.
- Crush the anchovies with a little oil to make a paste (or use a bit of anchovy paste per your taste). When the garlic oil stops sizzling, add the anchovies and mix with a wooden spoon. Mix in the cream and return it to the heat. Drain the pasta and add it to the sauce.
- Cook together until the sauce thickens. Add the parmesan and some freshly ground black pepper. If the sauce gets too thick and sticky, add some pasta water.


